
We moved in our house about 4 years ago. It was built in the 1990’s and was very outdated. Which an outdated house didn’t bother me, I love DIY projects. So, it was time to paint kitchen cabinets.
Our house was covered in lots of brown, yellow, and gold. I mean, gold light fixtures, brown cabinets and trim, etc. But, nothing that a few coats of paint couldn’t fix. Yes, even paint for the light fixtures. Like my post here about how I covered the gold with Rustoleum Metallic Spray Paint. Which still looks fabulous by the way (2021 update).

Metallic Spray Paint was used to cover the Beige Hood before painting the kitchen cabinets
In fact, before we painted our kitchen cabinets white, we had an overhead vent on our stove that was beige. I knew that the beige would not go well with the white cabinets so I also used the Rustoleum Metallic Spray Paint on that in Oil Rubbed Bronze.

See all that brown and beige. It was even worse before because that white trim on the left and that white window on the right, was also brown.
Anyways, to paint the hood first clean it really well with a degreaser. I like to use Simple Green. Next, tape off around it and cover everything with plastic. Spray paint will go everywhere, so make sure it is covered well.

Now, spray it lightly with a coat of spray paint. Let that dry, then spray again. Beware that you cannot spray it on too thick. If you do, it will cause the underneath to not be able to dry and it will bubble. I know this because it happened to me when I first sprayed it…

I had to peel that bubble off and sand it. Then repaint that area. It was not ideal to happen, but I love the way it turned out!

Step 1 – Clean
Now on to the cabinets. Clean them really, really well with the same degreaser as the hood. Like the Simple Green. You do not want to paint over dirt. If there is dirt remaining on the cabinets, it could cause your paint to peel.
Step 2 – Degloss
Once they are cleaned from the inside and outside. Use liquid sander, or deglosser, to get all of the sheen off. I bought ours from Home Depot. This takes place of sanding. It roughens up the outside of the wood. You will need to do this step twice.
Step 3 – Prime
Once that is dry, you are ready for primer. Now the product that you buy is super important! I was recommended Sherwin-Williams Extreme Bond Primer by several people. We only use Sherwin-Williams paint in our house, so it made sense to buy this primer.

Paint one coat of the Extreme Bond Primer. I only use Purdy Paint brushes and the 1.5″ angled brush was perfect for this job. You don’t want a brush that is too wide because it will hold more paint and you will have dripping. *The first time I painted the cabinets I painted with the doors on. This worked okay for that process of paint and primer but does not work well at all with Polyurethane. So, please remove all the doors.
One other tip is to lightly sand with 240 grain sand paper after the primer dries. Lightly sanding (more like wiping down) between each coat of paint/primer/polyurethane can give you super smooth cabinets.Just be sure to clean off any dust caused by sanding.

Step 4 – Paint
Once all of your cabinets have a coat of the Extreme Bond Primer on them and they are all dry, it is time to paint! Now your paint choice is just as important as the primer choice. We used Sherwin-Williams Emerald Urethane Trim Enamel in Extra White with semi-gloss finish. I chose Semi-Gloss because it will clean easier. Also, we paint our walls Satin finish and want our cabinets, trim, and doors to be contrasting with the Semi-Gloss.
*I actually went back and updated this post because we had to touch-up to our cabinets. I went back over it with flat paint and used a semi-gloss polyurethane. I was told previously that this Sherwin Williams paint did not need polyurethane finishing because it had it in there. However, cabinets are high touch used surfaces and really do need polyurethane. I recommend to use a flat paint finish for the cabinets then choose your sheen for the polyurethane.*

Do the same process as you did with painting the primer. We actually used a small roller for this, using the Mohair roller pads from Sherwin-Williams. These are smooth and don’t show bubbles. We rolled the outside surfaces that we could, then went over the groves with the angled Purdy Brush.


Once you have covered all of the cabinets with 1 coat of paint, you will want to let it dry completely. Lightly sand/wipe does with 240 grit sand paper for a smooth finish between each layer of paint. It is best to allow paint to dry for at least 6 hours between coats, or whatever is recommended on the paint can.
Then, you will need a second coat of paint everywhere. I did have to go over some areas for a third time. The hardest part to get coverage on is the groves and where the wood curves.

Step 5 – Protect
THIS IS A 2021 UPDATE. We did not originally apply a Polyurethane coating to our cabinets. Our paint started to peel in high touch areas.
I do recommend for longevity of your cabinets to apply 2 coats of polyurethane. This would be best if the cabinets are removed. This was a lesson learned, which happens when DIY-ing. Allow polyurethane to dry for 24 hours.
Also, with polyurethane you can determine the finish of your paint. You could use a flat paint then a semi-gloss polyurethane finish. Remember to lightly sand/wipe down with 240 grit sand paper between each layer of paint or polyurethane.
Finishing Touches
Once the paint is finished, you are ready for hardware. We priced knobs and handles at our local Home Depot and they are pricey! It was going to cost about $100 for 25 handles and knobs. If our kitchen already had them, I would have just used the Rustoleum Metallic paint to cover, but since we didn’t have them already we had to purchase.
I found some super cute handles on Amazon that had great reviews. They even came with 25 in a pack, which was exactly what we needed. So, we decided to use handles on all of the cabinets and drawers.
Here’s the exact ones we bought. They come with the screws and were perfect!

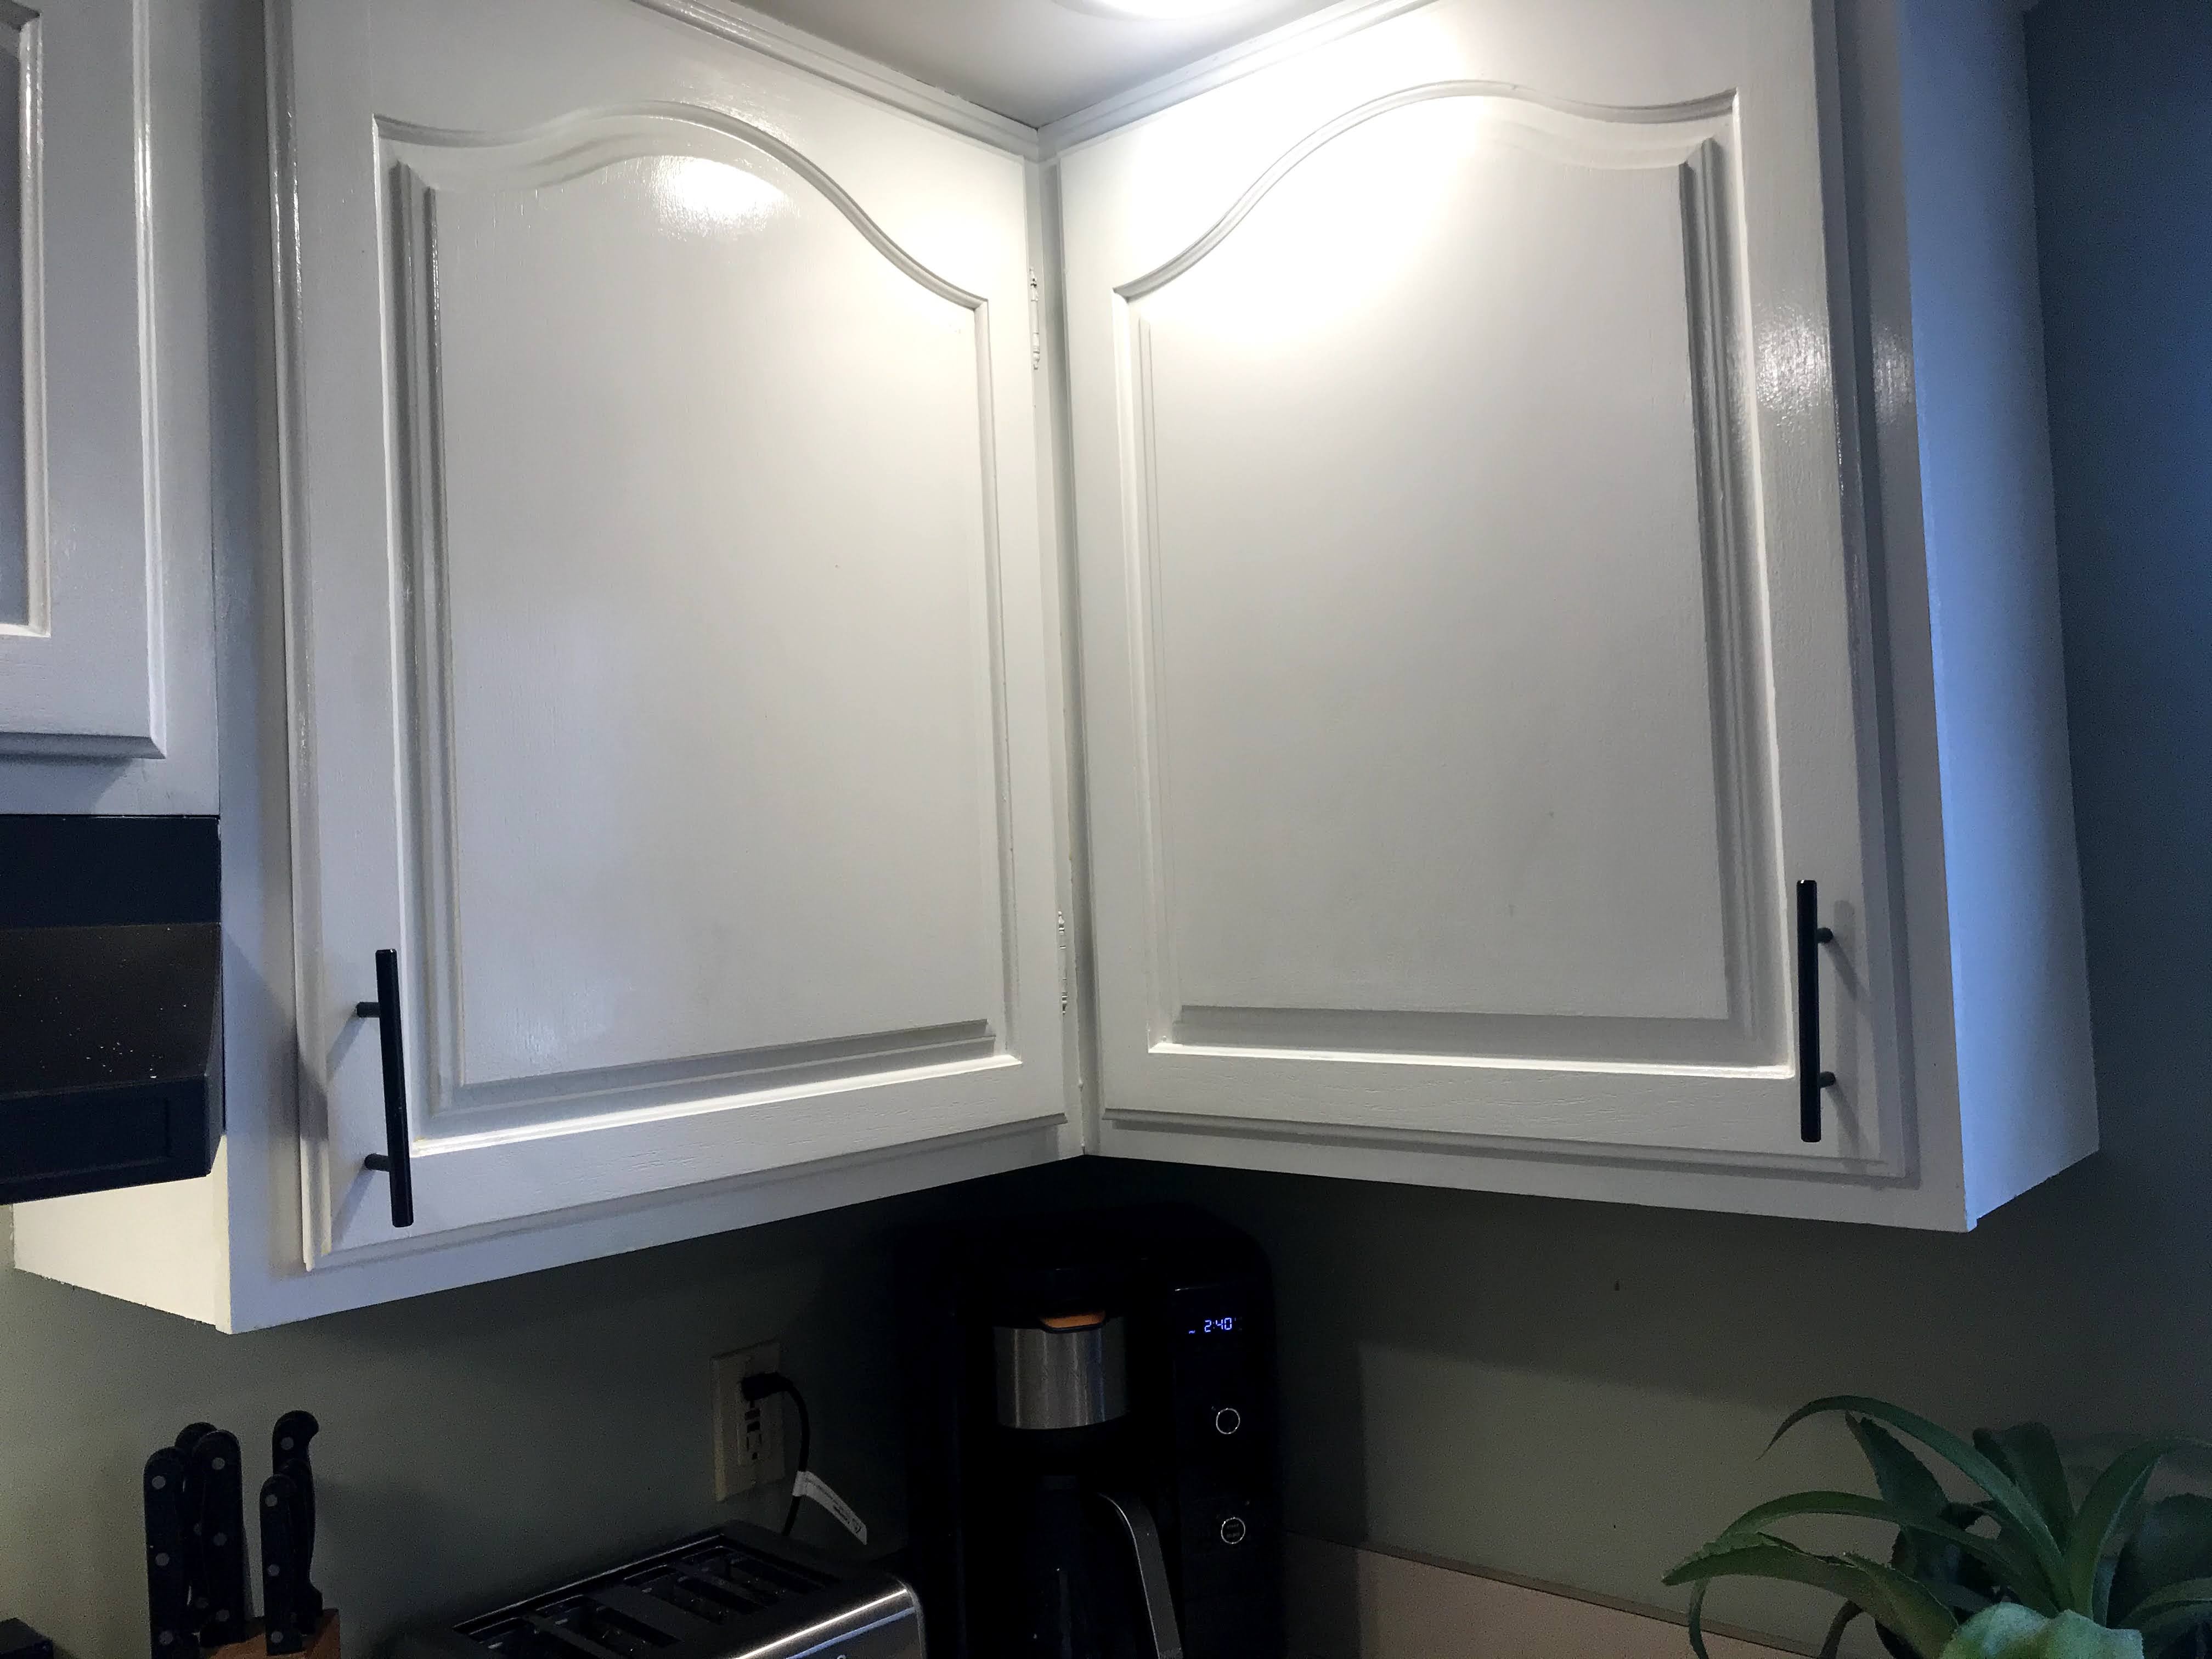
And that’s it! Step back and enjoy how bright your kitchen looks!
Here is up close photo of the retouched paint with 2 coats of Polyurethane. Nothing compares to white cabinets and I love the way it it brightens up the kitchen.
Below is what the kitchen looked like in December 2020, about 20 months after we initially painted the cabinets. There were some worn area from the original paint job but overall not too bad. For the retouch I took off all cabinets and drawers, added 1 coat of paint and 2 coats of polyurethane. Looking back on photos from 2019 of how dark our kitchen looked with the brown, I would totally do this again. Completely worth it!
I thought you all would appreciate my sink full of dishes LOL! I’m a mom of 3 school-aged busy kids, work full time, and run this blog on the side. So, this is as cleans as this kitchen gets on most days, ha!

This site is supported by advertisers and may contain affiliate links. See copyright & disclosure policy here for more information.

Ok you have to show us the finished kitchen.
From start to finish, how long did this take?
I worked on it over 3 days allowing each coat to dry over night.
How visible are the grooves and other spots. Any areas where the wood is seeping through with tannins? THANKS!
No there it’s. That primer covers really well
No sealer or clear coat?
Nope it’s in the paint
Does the primer and paint have a string smell ?
Not too terrible but did smell like paint. I haven’t had a problem with any of sherwin Williams paints being too overwhelming
How strong is the paint smell? Should I send my two year old and 7 month old to their Grandparents’?
Probably should. I don’t feel like it was overwhelming but I did have the windows open
Did you take off the doors to your cabinets?
No I did not. I was extra careful to prevent dripping
This is awesome! Truly inspiring – I have the same cabinets and am going to start painting the cabinets white in my laundry room first! How did you paint around the hinges?
I have painted our bathroom and kitchen this year.All the old oak.If you plan on I would recommend an Acrylic paint.And yes remove doors ! This is great paint and needs to level..(in a flat position) Sherwin William and Benjimin Moore have the best as well as Bher and maybe Valspar. They are called Alkyd Paint. Cure hard.2 coats primer plus 2 coats paint should hide oak grain.Did on ours anyway.
Can you see any brush marks?
Not if you put enough coats on.
Thank you. I just finished our cabinets and they turned out great!
How many gallons of paint did you use?
1 gallon of paint with 1 quart of polyurethane
Wait…….you didn’t remove the doors to paint them? Didn’t you paint the inside of the doors? Or inside edge of the cabinets?
Our cabinets have invisible hinges. I painted the exterior first let dry, then opened and did the inside. Definitely would make more sense to remove but we did not have a area to lay them all out on to paint.
Looks great! Did you paint the interior of the cabinets as well?
Yes!
It looks like it may only be a few months since you painted the cabinets (which look great, btw!) My question stems from my husband’s negative remark to my suggestions a few weeks ago of painting our cabinets white = he is afraid that with a little time they will be come chippy. Our kitchen cabinets are in great condition and pretty new. We renovated our kitchen and used cabinets that we already had from a previous location.. great cabinets, but I hate the color.. dark cherry.. I love lighter cabinets and finding flooring to match is a struggle! So if this process worked for you as far as “wear” goes, then I’m going to show him your project!! (FINGERS CROSSED!) xx
Does the oak wood grain show through?
Yes it does
How is the paint holding up?
It’s holding up well. I have one cabinet where my kids like to touch often and have had to touch it up a few times. I just keep encouarging them to use the handles 🙂 The white does show more dirt than our brown did, so I have to wipe them down often. I think I may add a polyurethane or some other top coat to them to help with dirt.
What type of clear coat or polyurethane would you recommend? I just finished my cabinets, and am trying on a table now, but have concerns because it gets used daily.
I used Varathane from Home Depot. It worked well but be sure to apply thin coats and be careful, it runs easily.
Please provide a pic of the view of the finished cabinets in the kitchen
I have exposed hinges. What would you recommend in my case?
Remove the doors and hinges.
I did that , and u can see the cabinets bleed through the paint .
Roughly how many gallons of paint did you need for how many cabinets? I have a fairly small kitchen and I can’t decide if I need one or two gallons.
1 gallon for 19 doors and 7 drawers. 1 quart of polyurethane with 2 coats applied.
[…] Original Source […]
Will this work on any type of kitchen cabinets?
I’m not sure. I’ve heard great things about chalk paint for difficult furniture/cabinets
What was the name of the white you used
I believe it’s called extra white
Does the white show lots of fingerprints?
Not so much fingerprints but I have noticed it shows dirt more
Can you post a pic of the finished cabinets and the entire kitchen pld
Just updated the post…. finally!
Hi! I have a couple of drawers on the front of the sink that don’t function- decorative only. Do you have that too? If so, did you put handles on those drawers? Thanks!
yes, we have those. I did not put handles on them. I figured they would get in the way when doing dishes.
I’m ready to tackle ours. We was gonna hire someone to paint them, but so expensive and after reading your post I feel like my husband and I can do this together.
How are yours holding up? Did you paint the inside of yours as well? We have a lot of cabinets and drawers, how many gallons of paint did you use?
I just updated the post with photos 20 months later and the retouch we did. 1 gallon of paint and 1 quart of polyurethane. Best of luck to you.
I really like the color and the project. My husband and I are in a debate about whether or not we should paint our cabinets on our own or do a professional cabinet door replacement. I’m thinking we’re leaning more toward cabinet door replacement, but I would really like to try this project in our rental property. Thanks for sharing.
You did a great job! I’ve read from other pinterests that polyurethane will yellow white cabinets. Can you please update us later this year or next year if it happened with yours, unless it happens earlier? Thank you!
The groves where the cabinet details are do look a bit cream colored or yellow-tinged when you look up close 🙁 Over all they do not look yellow and still worth it.