I have gathered my thoughts and put together my top 10 Crochet Tips that Every Crocheter should know! These are my personal opinions and things that have helped me along the way. Remember that every crocheter is at different levels and have different experiences. I hope this finds you well and let’s you expand your crochet knowledge!

1. Read the yarn label
There is lots of valuable information found on the yarn label! From the weight of the yarn, to the yardage, the material it’s made of, etc. You will even find a free pattern at times. The yarn even has a color name, which is usually found by the bar code.
Let’s look at the yarn label below…. It is called Beachglass by Yarnspirations Caron Cotton Cakes and is 60% cotton and 40% acrylic. The boxes across have lots of other info. It is #4 Medium Weight. The next box is knitting instructions. The third box is for crochet gauge. It says using an H hook, you will get 17 rows and 14 sc in 4″ x 4″ square. I didn’t know what that info meant for the longest time! Obviously you may use this yarn with a different hook depending on the pattern. Then the last boxes are the washing directions. 
2. Determine your yardage of yarn
You will also see on the label above that it is 3.5 ounces and 211 yards of yarn. Most patterns will state how many yards are required to complete that pattern. So, reading the label will also tell you how many skeins to get to complete the project.
But, what happens if you have yarn in your stash and not sure how many yards you have?? There is NOTHING more frustrating that getting to the end of your work and not having enough yarn!! Well, there is a solution! All you need is a kitchen scale to weigh the yarn. Do the math to determine how many yards you have with the ounces and the label. See my post here where I go into detail on this. You can also determine how many yards of yarn were used in a project AFTER it was completed.
3. Check your gauge
I know this is a pain and no one wants to check gauge. But it is super important! Gauge is usually measured in 4″ by 4″ squares. It is highly recommended to do a gauge swatch prior to starting a project. Especially, if it’s a larger project. No one wants to get half way through their work to realize it is waaayyy too big or too small!!
The gauge on a pattern is how many stitches and rows the designer had to make that 4″ square using the hook and yarn recommended for the pattern. Every crocheter holds their tension differently. There may be times when you need to adjust your hook to get the right gauge. If you are getting more stitches in 4″ than the gauge calls for, then go up a hook size. Going up a hook size will make your stitches larger and give you less stitches in 4″. If you are getting less stitches in 4″ than the gauge calls for, go down a hook size. Going down a hook size will make your stitches smaller and give you more stitches in 4″.
I have also noticed at times when I have done gauge swatches, that going from an I 5.5mm hook to a J 6.0mm hook will change the amount of stitches for me in 4″ but not the amount of rows for 4″. I had a particular pattern that I couldn’t get the swatch correct because reducing the hook only changed my stitches not my rows. Because of this, I had to reduce the amount of rows I made to get the pattern correct. I have no other way to explain this, except everyone crochet differently. Just keep your tape measure close by to make sure you are staying on target throughout your work.
4. Pull your slip stitches tight when joining
This is definitely a top tip I can give any crocheter! This would be used when working in the round and you are joining to the first stitch. After joining, pull that slip stitch tight! This will make that join less visible.
Test it out. You will be amazed at how much difference this small step will make in your work! Without pulling the slip stitch to a join tight, it leaves a gap. When you pull your join tight ever. single. time the join becomes less visible!
5. Do not count beginning chains as a stitch, unless it is absolutely necessary for the pattern.
Counting the beginning chain as a stitch will make your join more visible also. Beginning chains are usually 1 chain for a single crochet, 1-2 chains for a half double crochet, 2-3 chains for a double crochet, and 3-4 chains for a triple crochet. The amounts of chains will depend on the pattern.
When I write patterns, I prefer 1 chain to begin a hdc, 2 chains to begin a dc, and 3 chains to begin a tc. Then you will join to the top of the stitch, skipping over the chain. The chain’s purpose is only to get your start of the round to be the height needed.
I not only don’t count chains as stitches for my patterns that work in the round, but also the ones that are worked flat. (In the round are patterns like hats, worked flat are back and forth rows like a blanket). Although, there are times in crocheting when you need to use the chain as a stitch for the layout of the pattern.
6. How to fasten off your work without it being noticed
This is a very important step. I remember many years ago when I was a beginner crocheter, I struggled with my fastening off. It would leave a little knot. I wasn’t exactly sure what I was doing wrong.
To fasten off without noticing when working in the round, join to the last stitch. Cut the yarn about 4 inches and just pull the yarn straight through the slip stitch with a hook. Take the hook and insert into the stitch you just joined to going in from the back side. Pull the tail of the yarn to the backside through that stitch. Now weave in the end.
To fasten off without noticing when working flat: after completing the last stitch, cut the yarn about 4 inches. Work as you would for chaining, pull the tail completely through the chain. Pull tight to close the knot. Weave in the end.
7. How to weave in your ends so they don’t come out.
This tip also took me a while to learn. I remember back in the day, I used to take my crochet hook and weave the ends in and out of my work. Well, this did not work AT ALL. 9 times out of 10 it would complete completely unweaved.
A tapestry needle is a MUST when weaving in ends. After you have finished off your work, attach a needle. Weave the tail back AND forth in your work. I usually just go one time one way, then back the other way. But not following the same path. This helps secure it.
When changing colors, I will crochet over the tail of the color I just worked with. But I do not go over the whole tail. I like to leave a few inches, then use a needle to weave it through a different area. This works great when making clothing or blankets that will be washed several times.

8. Read the pattern thoroughly
Some times when crocheting, you may misread or misinterpret a pattern. It can throw your whole pattern off! Most patterns include pattern notes, be sure to read them and try to understand what the designer is saying. Lots of blogs have comments at the bottom, if you have a question it may already be answered there.
I highly recommend to read the whole pattern prior to starting. Make sure that it makes sense to you. Contact the designer if you have questions. Most of the time designers are responsive on social media or by email. I get questions all the time about my patterns and I am always happy to help. I would rather help guide someone then them being stuck ad frustrated.
9. Choose your hook size
Hook size can make a huge difference in a project. The yarn label above is for Caron Cotton Cakes and has gauge for an H hook. While an H hook is a nice hook for a medium weight yarn, it can make a tighter stitch. Which may be too tight if you were making a garment. I would recommend to size up to an I or a J for a garment on a Medium Weight yarn. But if you were making a hand towel, a H hook would be perfect.
Bulkier weight yarns will use a larger hook and lighter weight yarns will use a smaller hook. Determine hook size by the pattern and completing a gauge swatch.
10. Invest in Good Quality Hooks
If you are in any way interested in crocheting, I highly advise you to invest in good quality hooks. They make a difference for your tension and your ease of crocheting. You will be surprised at the difference they will make. Many cheap aluminium hooks will snag on the yarn or the yarn will not glide off the hook. But improving the quality of the hook will fix that!
I crocheted for many years with Boye aluminum hooks from Walmart. When I got into crocheting just about every day, my hands would cramp. I started out buying the ergonomic hooks from Walmart. While they helped my hand cramping, they didn’t help with the ease of crocheting. Yarn would still get snagged. When I purchased my first Clover Amour hook, I was so surprised at how amazing they were. The yarn glided right over the edge of the hook. I was crocheting much faster and my tension was consistent. I was sold, I purchased one in every size.
I have read many comments on the Clover Soft Touch hooks. I have never tried these, but the shaft is much shorter than the amour. The Clover Amour hooks have a nice thick grip. No more hand cramping and I crochet faster. That’s a win – win!
I have also read a lot about Furls Hooks. I would love to be the owner of some one day! They are pricey, but apparently are way worth it! The owner of Furls Hooks was on the Bhooked Podcast one day and I loved listening to that episode. Very interesting.
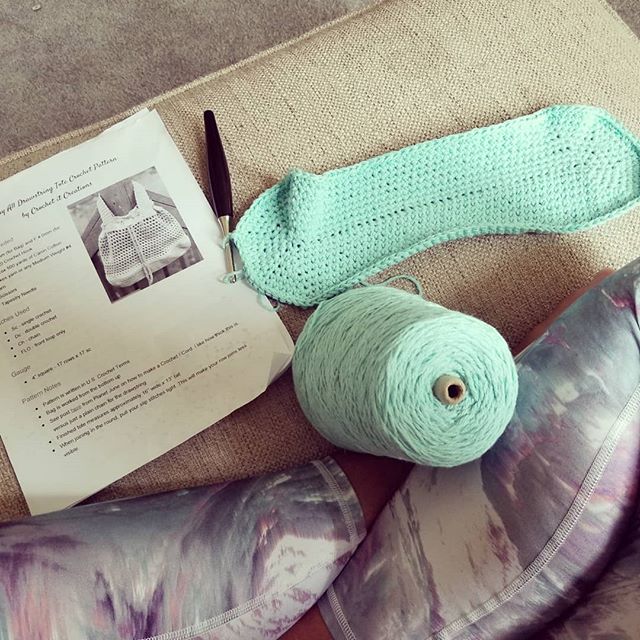
I hope you find this information helpful! As always, you can comment below or email me with any questions! Purchase my PDF printable patterns, like the one in the photo below, on my Ravelry Store.

This beautiful photo credit goes to Alyssa @1craftym0m. This photo was taken while she was testing my Carry All Drawstring Tote free pattern. Find this photo and many others by Alyssa on her Instagram page.