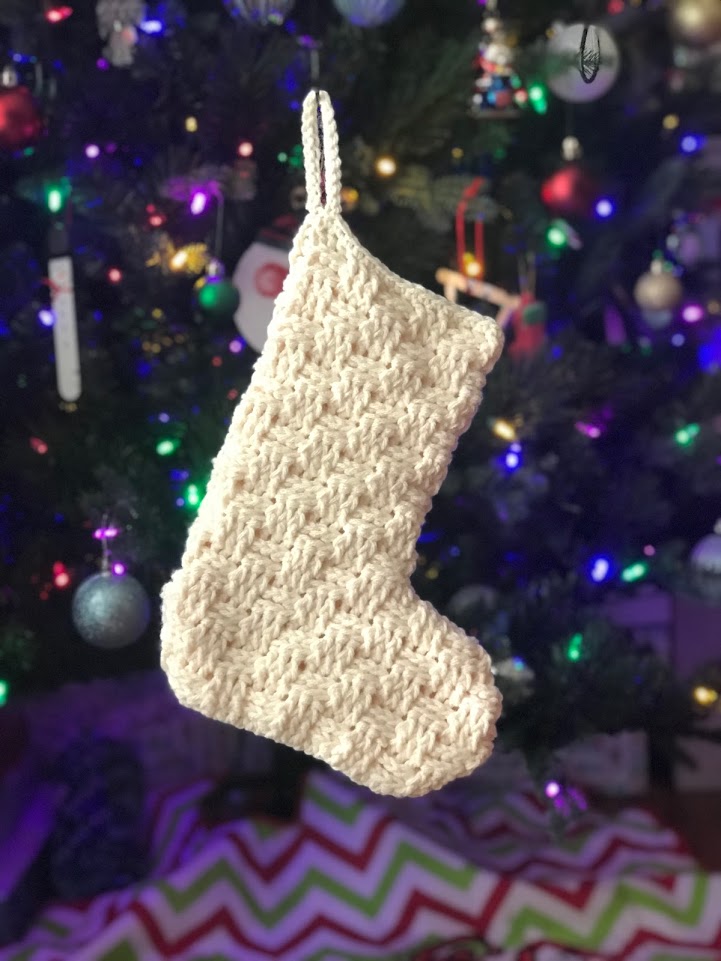
Crocheted Christmas Stockings are so fun to make and look beautiful! Check out the FULL Basket Weave Stocking Crochet Pattern below by Crochet It Creations.
The Basket Weave technique is composed of Front Post and Back Post Double Crochet Stitches. It looks complicated, but is very simple to create!
Pattern is worked from the bottom up. It measures approximately 11″H x 9″W. I used 1 skein of Michael’s Stores Loops & Threads Impeccable yarn for the stocking in the photos.
Also, check out the Ribbed Christmas Stocking Christmas Pattern.

Materials Needed
- I 5.5mm Crochet Hook
- 1 skein of Loops & Threads Impeccable Medium #4 Weight Yarn, (100% acrylic, 4.5oz/127.5g, 285yds/260m) – Aran Color used in Photos
- Scissors
- Tapestry Needle
Gauge
- 4” square = 6.25 Rows x 12 DC
Stitches Used/Abbreviations (US Terms)
- FDC – Foundation Double Crochet
- DC – Double Crochet
- FPDC – Front Post Double Crochet
- BPDC – Back Post Double Crochet
- SC – Single Crochet
- Ch – Chain
- Join – Slip Stitch to first stitch
- St(s) – Stitch(es)
- Sk – Skip
Pattern Notes
- Beginning chain DOES NOT count as a stitch. To join at the end of each round, skip over the beginning chain and slip stitch to the top of the first stitch.
- Finished stocking measures 11” H x 9” W
Basket Weave Stocking Crochet Pattern

Body of Stocking
Leave a long tail, about 3 ft long, at the beginning of the slip knot for sewing the stocking.
Rnd 1: FDC 60, join. (OR Ch 62, DC in 3rd ch from hook and each ch across, join.)
Rnd 2 & 3: Ch 2, [FPDC in 3 sts, BPDC around next 3 sts] around, join. (60)
Rnd 4 & 5: Ch 2, [BPDC in 3 sts, FPDC around next 3 sts] around, join. (60)
Rounds 6 – 9: Repeat rows 2 – 5
Rnds 10 & 11: Repeat rows 2 & 3 again.
Rnd 12: Ch 2, [BPDC in 3 sts, FPDC around next 3 sts] 3 times, sk 24 sts, [BPDC in 3 sts, FPDC around next 3 sts] 3 times, join. (36)
Rnd 13: Ch 2, [BPDC in 3 sts, FPDC around next 3 sts] around, join. (36)
Rnd 14 – 27: Repeat rows 2 – 5 (ending with a repeat of rounds 2 & 3)
Rnd 28: Ch 1, SC around, join. (36) Fasten off
Photo 1: Working the Stocking

Hanger
Ch 21, SC in 2nd chain from hook and each ch across, join. Sew to the outside corner of the stocking.
Shape the Stocking
Turn Stocking inside out. Using the beginning tail, sew along the blue lines as shown in photo 3.
Photo 2: Wrong Side of stocking for Sewing

Turn right side out and weave in all the ends.

Save for later or share with others using the share buttons at the top and bottom of post. If you have any questions please comment below or you can email me at jessica@crochetitcreations.com.
I love to see photos of your work and read your comments. Follow Crochet It Creations on all of your favorite social media sites! Join my Crochet It Creations Crochet Friends Facebook group to further connect!
You may sell your items made from my patterns. Please do not use my photos as your own to sell your work. A link back to my site is much appreciated when selling your items from my patterns. I hope you enjoy!
This site is supported by advertisers and may contain affiliate links. See copyright & disclosure policy here for more information.