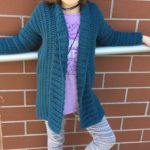
The Perfect Sunday Shrug is a cozy sweater crochet pattern for your little one. This pattern below comes in Child Size 4 fitting around 23″ chest circumference.

This Crochet Shrug is worked using Red Heart Hygge Bulky 5 Weight Yarn. You can substitute out for a similar yarn as long as you meet gauge. As always you should check gauge before starting any pattern. Especially anything that is worn to be sure the fit will be right. If your gauge is off, then your sizing will be off.
The Child Shrug pattern is also worked with a M/N 9mm crochet hook. I use Clover Amour crochet hooks. Some hooks may say a different letter for 9mm. Again, gauge will help determine if you are using the correct hook size.
This pattern is only for the child size 4. If you are interested in other sizes, check out the PDF digital download pattern on Etsy and Ravelry in sizes 4 – 12. Chest measurements for the other sizes are: Child 4 – 23”, Child 6 – 25”, Child 8, Child 10, and Child 12 – 30”.
Sizes Available/Chest Size
- Child 4 – 23”
Materials Needed
- M/N 9mm Crochet Hook
- 200 yards of Red Heart Hygge Yarn (Bulky 5, 70% Acrylic/30%Nylon, 8oz/227g, 212yd/194m)
- Scissors
- Tapestry Needle
- 6-8 Stitch Markers
Gauge
- 4” square = 6 rows x 8 HDC
Stitches Used/Abbreviations (US Terms)
- SC – Single Crochet
- HDC – Half Double Crochet
- FHDC – Foundation Half Double Crochet
- HDC2TOG – Half Double Crochet 2 Stitches Together
- Sl St – Slip Stitch
- Ch – Chain
- Join – Sl St to the top of the first stitch
Pattern Notes
- Beginning chain DOES NOT count as a stitch.

Perfect Sunday Shrug Crochet Pattern
Step 1: Make a Rectangle
Leave 12” tail at beginning of slip knot for sewing.
Row 1: FHDC 18, turn. OR Ch to 19, HDC in 2 ch from hook and each ch across, turn.
Row 2 – Row 35: Ch 1, HDC across, turn. (18)
Fasten off leaving a long tail for sewing.
Step 2: Shape the Crochet Shrug
Fold rectangle in half lengthwise. Using a stitch marker, mark 7 rows back on each side. Sew the rows together on each side to create a tube that will be the sleeve.
Photo 1: Rectangle folded in half with the rows on each side marked.

Photo 2: Sew at red marks to close sleeves

Photo 3: Area sewn to shape the shrug and start the sleeves
Photo 4: Other Side sewn to start the sleeve, note that photos 3 & 4 are with the border already worked

Step 3: Add a Border to Your Crochet Shrug
Join with a Sl St to the open area from the body left unsewn.
Rnd 1: Ch 1, HDC around the entire opening placing HDC2TOG in the corners where the sleeves were sewn together (to prevent a gap), join. (56) Note: To work evenly around the ends of the rows place 3 HDC over 2 rows.
Rnd 2 – Rnd 4: Ch 1, HDC around, join. Fasten off.
Photo 5: Opening of shrug with completed border.

Photo 6: Completed Child Shrug thus far before sleeves added

Step 4: Add Sleeves to the Shrug
Join with a Sl St to the sleeve opening at the bottom where it’s sewn.
Rnd 1: Ch 1, HDC2TOG, HDC in remaining sts around, join. (17) TURN
Rnd 2: Ch 1, HDC2TOG, HDC in remaining sts around, join. (16) TURN
Rnd 3: Ch 1, HDC around, join. (16) TURN
Rnd 4 – Rnd 9: Repeat rounds 1-3
Rnd 10 – Rnd 11: Ch 1, HDC around, join. TURN (12)
Rnd 12: Ch 1, SC around, join. Fasten off.
*Turning on each round gives you the continued look of the body of the shrug.
Repeat on the other side, you will have to start with the wrong side of the shrug to get the continued look. Weave in all ends.
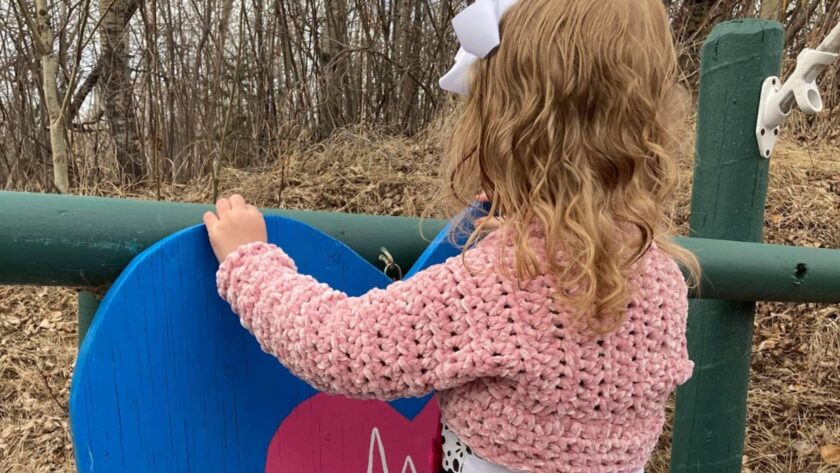
Photo 7: Completed Sleeves

Save for later or share with others using the share buttons at the top and bottom of post. If you have any questions please comment below or you can email me at jessica@crochetitcreations.com.
I love to see photos of your work and read your comments. Follow Crochet It Creations on all of your favorite social media sites! Join my Crochet It Creations Crochet Friends Facebook group to further connect!
You may sell your items made from my patterns. Please do not use my photos as your own to sell your work. A link back to my site is much appreciated when selling your items from my patterns. I hope you enjoy!
This site is supported by advertisers and may contain affiliate links. See copyright & disclosure policy here for more information.