Learn how to work the Celtic Weave Stitch in the round with written instructions, photos, and video guidance by Crochet It Creations.
The Celtic (pronounced with a hard K in front) Weave Stitch is a woven cable pattern. It uses post stitches to cross in front and behind other stitches. This video is working the Celtic Weave Stitch in the round, if you are looking for a tutorial for flat back and forth rows, see post HERE.
To begin the Celtic Weave pattern, chain any multiple of 4. Work rounds 1 – 3 below and repeat rounds 2 & 3 until reaching desired length. There are multiple steps to each round. See video and photos below for guidance.
If you wish to work the Celtic Weave Christmas Stocking from the video below, see the pattern HERE.

Materials Needed:
- Any Size Crochet Hook (I recommend sizing up 1 -2 sizes from yarn label’s recommended hook size so the stitches aren’t too tight. )
- Any Weight Yarn
Stitches Used/Abbreviations (US Terms)
- TR – Treble Crochet
- FPTR – Front Post Treble Crochet
- SC – Single Crochet
- Ch – Chain
- Join – Slip Stitch to first stitch
- St(s) – Stitch(es)
Celtic Weave Video Tutorial
Celtic Weave Stitch in the Round Written Instructions
Chain any multiple of 4, join to form a circle. (Stocking pattern is chain 60.)
Round 1:
Ch 3, [skip 2 st, TR in next 2 sts, cross in FRONT of sts just made and TR in first skipped st, TR in second skipped st] around, join. See photos 1 – 4.
Round 2:
Ch 3, skip 4 sts, FPTR around next 2 sts, cross BEHIND sts just made and FPTR around third skipped st, FPTR around forth skipped st, (we will come back to the first 2 skipped sts at the end of the round)
[skip 2 sts, FPTR around 2 sts, cross BEHIND sts just made and FPTR around first skipped st, FPTR around second skipped st] repeat around until 2 sts remain,
skip 2 sts, FPTR around the first 2 skipped sts of the round, cross BEHIND sts just made and FPTR around first skipped st, FPTR around second skipped st, join. See photos 5 – 11.
Round 3:
Ch 3, skip 4 st, FPTR around next 2 sts, cross in FRONT of sts just made and FPTR around third skipped st, FPTR around forth skipped st,
[skip 2 sts, FPTR around next 2 sts, cross in FRONT of sts just made and FPTR around first skipped st, FPTR around second skipped st] repeat round until 2 sts remain,
skip 2 sts, FPTR around the first 2 skipped sts of the round, cross in FRONT of sts just made and FPTR around first skipped st, FPTR around second skipped st, join. See photos 12 – 18.
Rounds 4 – ??: Repeat Rounds 2 & 3 until reaches the desired length.
Step-By-Step Photo Guidance for the Celtic Weave Stitch
Photo 1: Round 1 – Ch 3, sk 2 ch, TR in next 2 ch. Be sure to include first chain that was used to join the circle

Photo 2: TR in first skipped ch, TR in second.

Photo 3: Sk 2 ch, TR in next 2 ch, TR in first skipped ch, TR in second. Repeat around.

Photo 4: Join to top of first st, skipping over the beginning ch 3.

Photo 5: Round 2 – Ch 3, sk 4 sts, FPTR in 2 sts.

Photo 6: FPTR in 2 skipped sts, be sure to cross BEHIND.

Photo 7: Sk 2 sts, FPTR in 2 sts. It can be easier to feel the stitches than to see them.

Photo 8: FPTR in 2 skipped sts, crossing BEHIND. Continue working the repeat around.

Photo 9: End of round 2, 2 sts remaining + first 2 skipped sts.

Photo 10: FPTR in first 2 skipped sts, working in front of Ch 3 from the beginning.
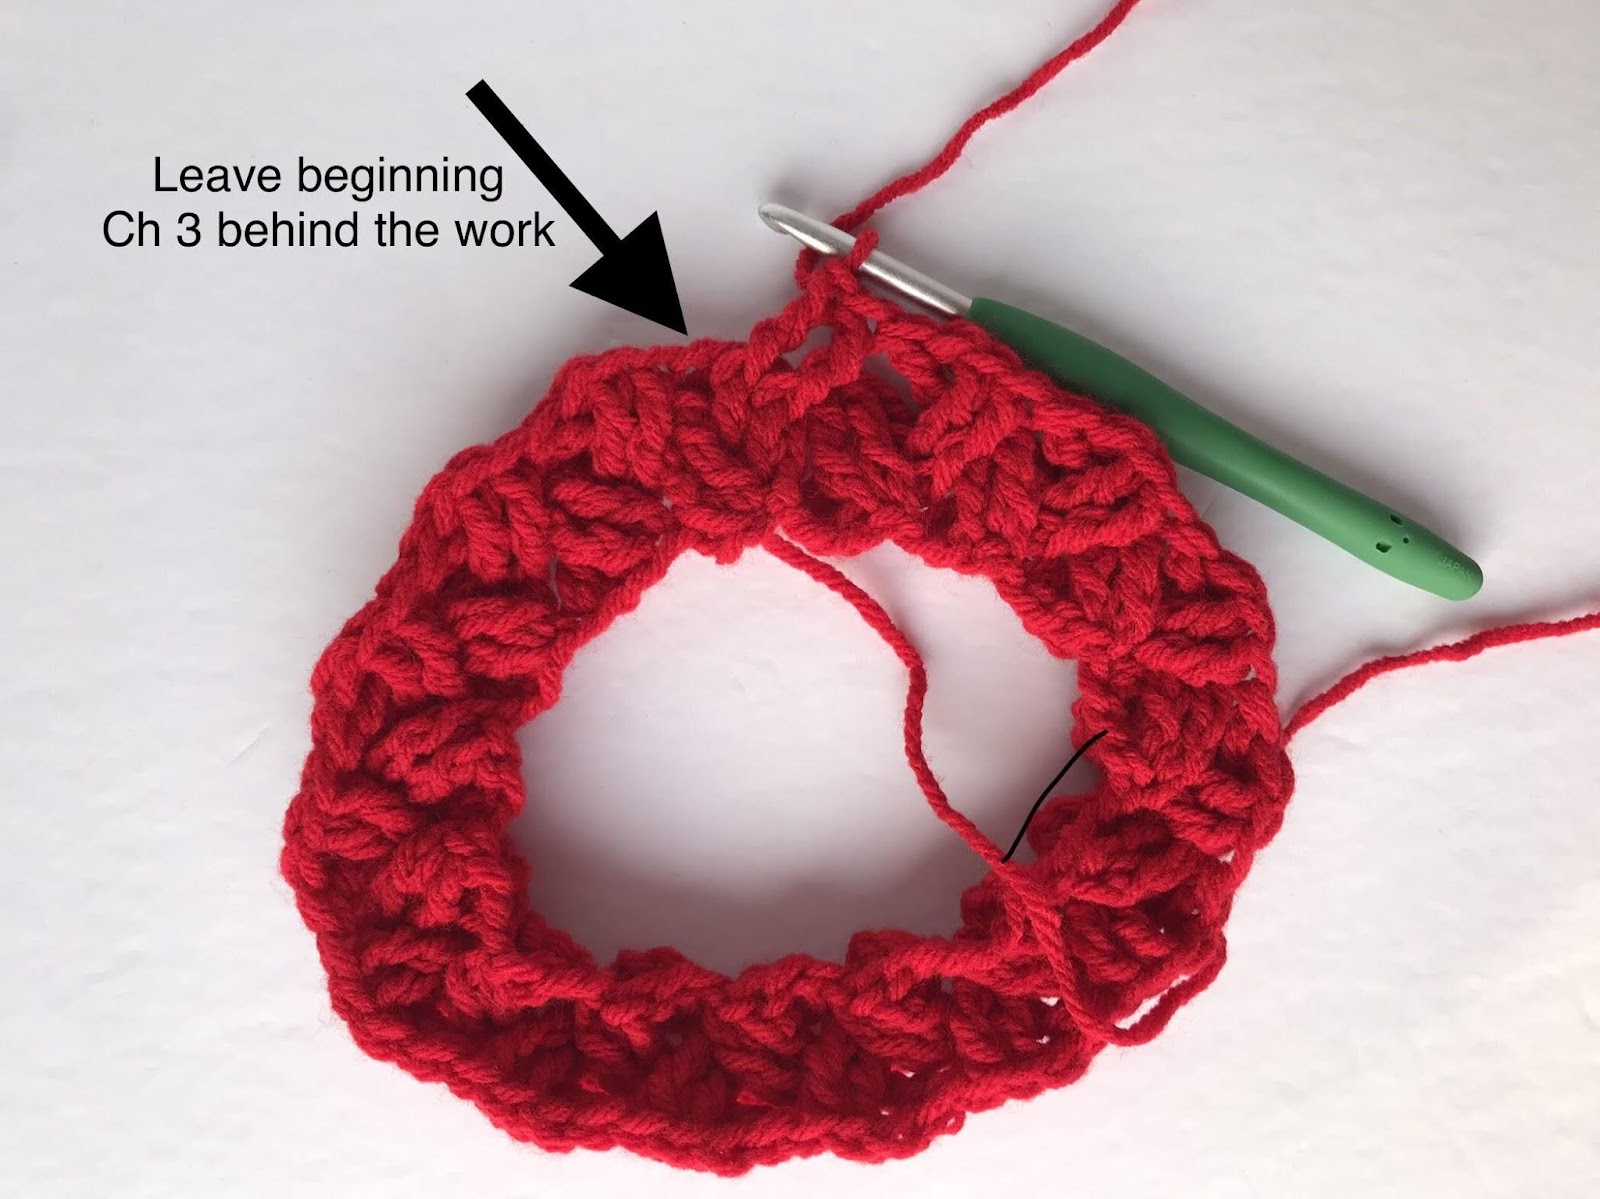
Photo 11: FPTR in 2 skipped sts, join to top of first st.
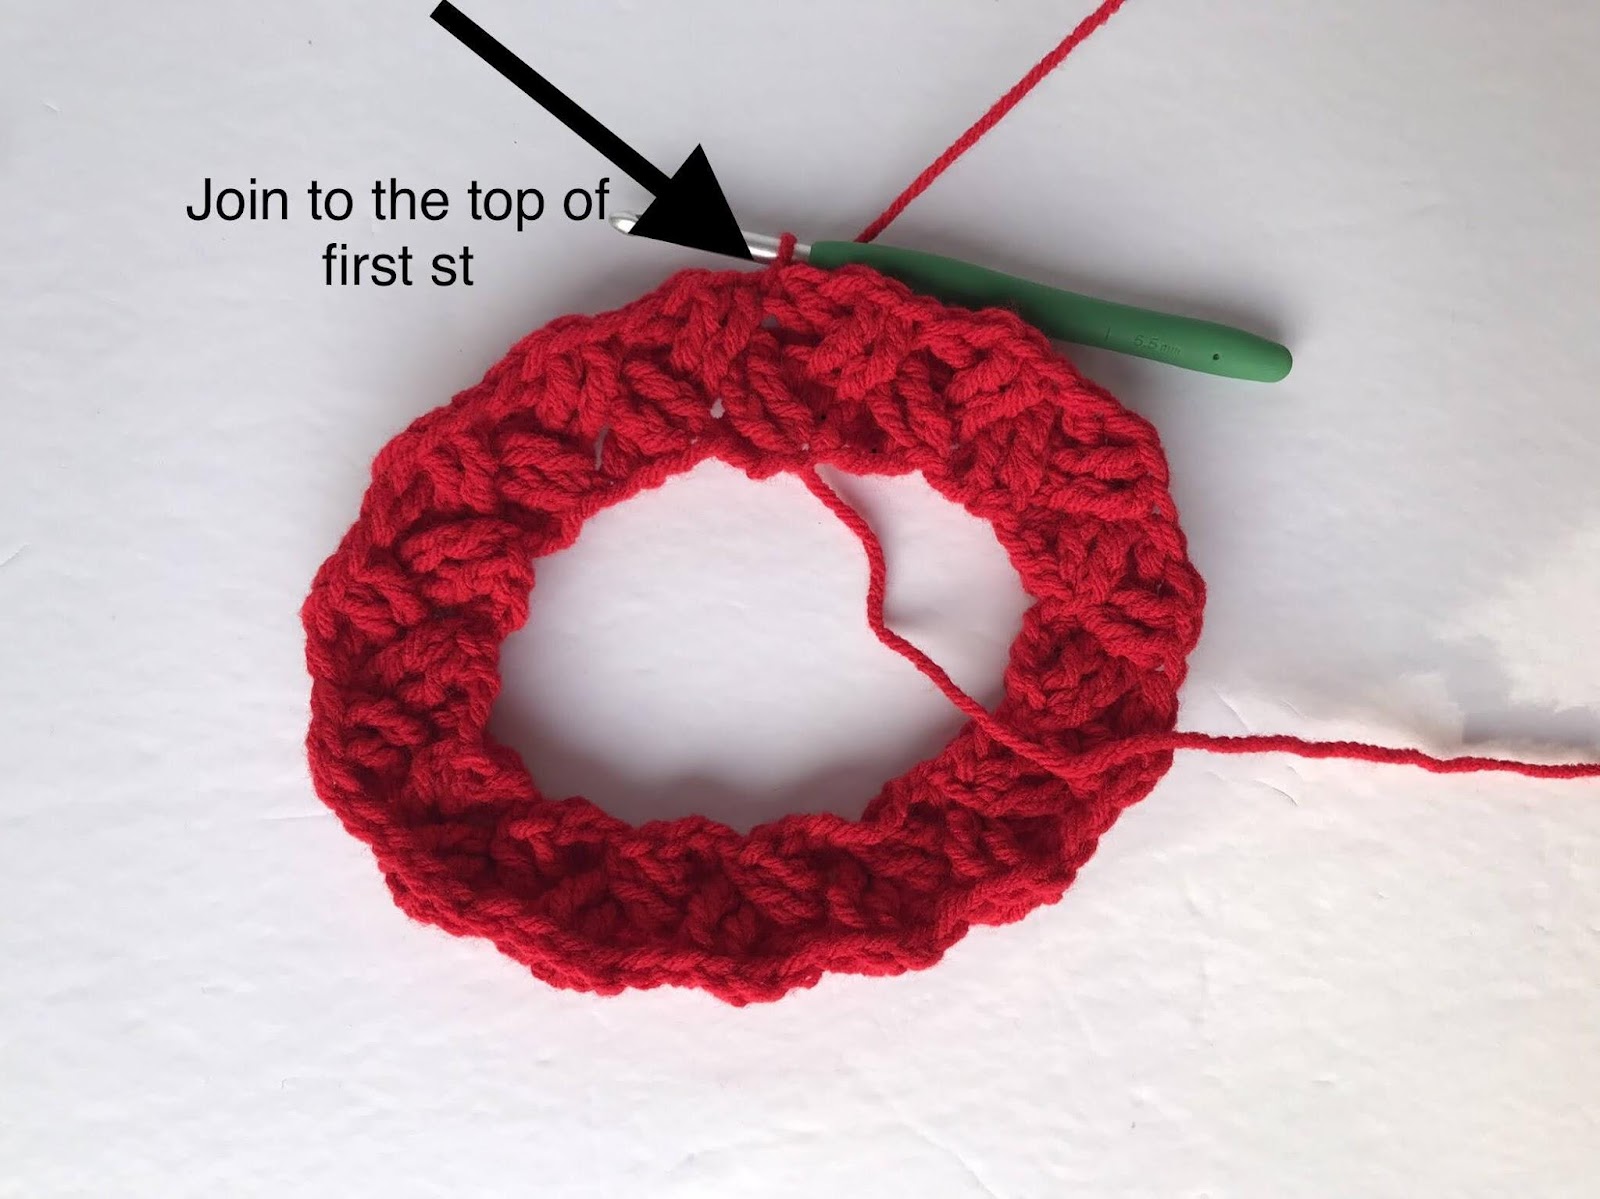
Photo 12: Round 3 – Ch 3, sk 4 sts, FPTR in 2 sts.
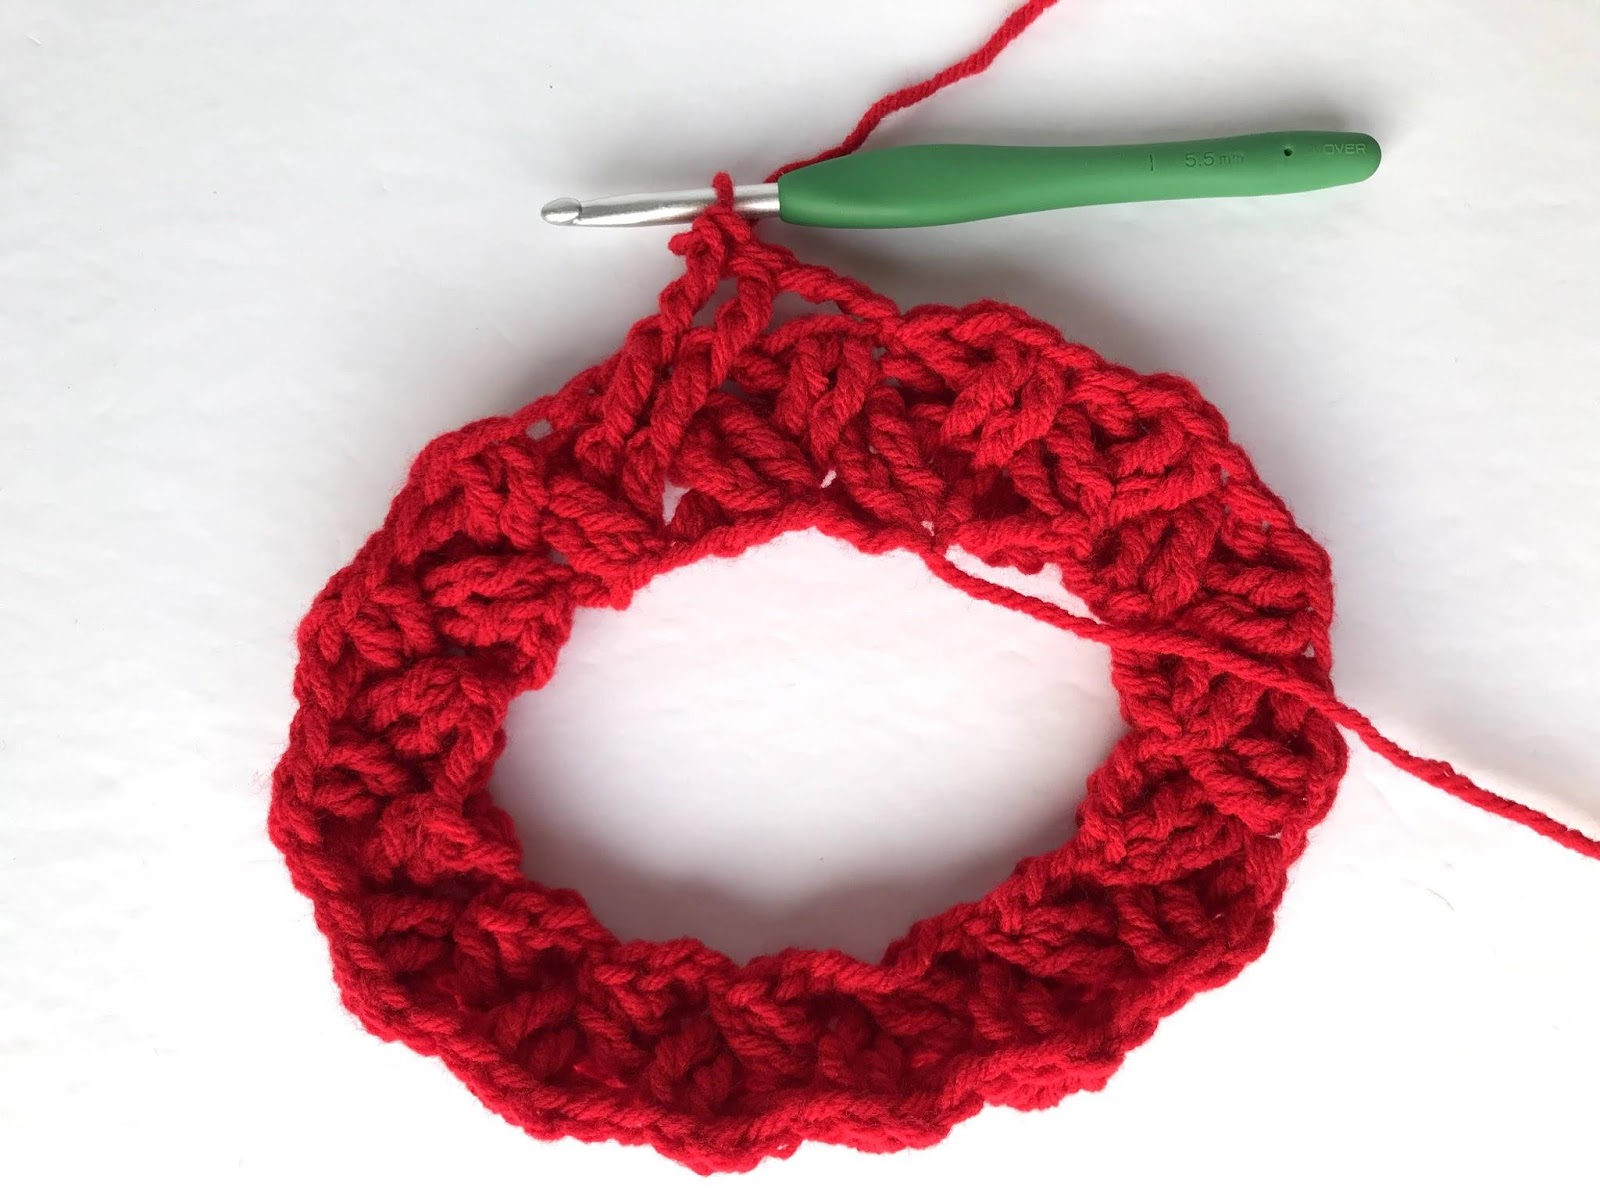
Photo 13: FPTR in 2 skipped sts, crossing in FRONT of sts just worked.

Photo 14: Sk 2 sts, FPTR in 2 sts.

Photo 15: FPTR in 2 skipped sts, crossing in FRONT of sts just worked.
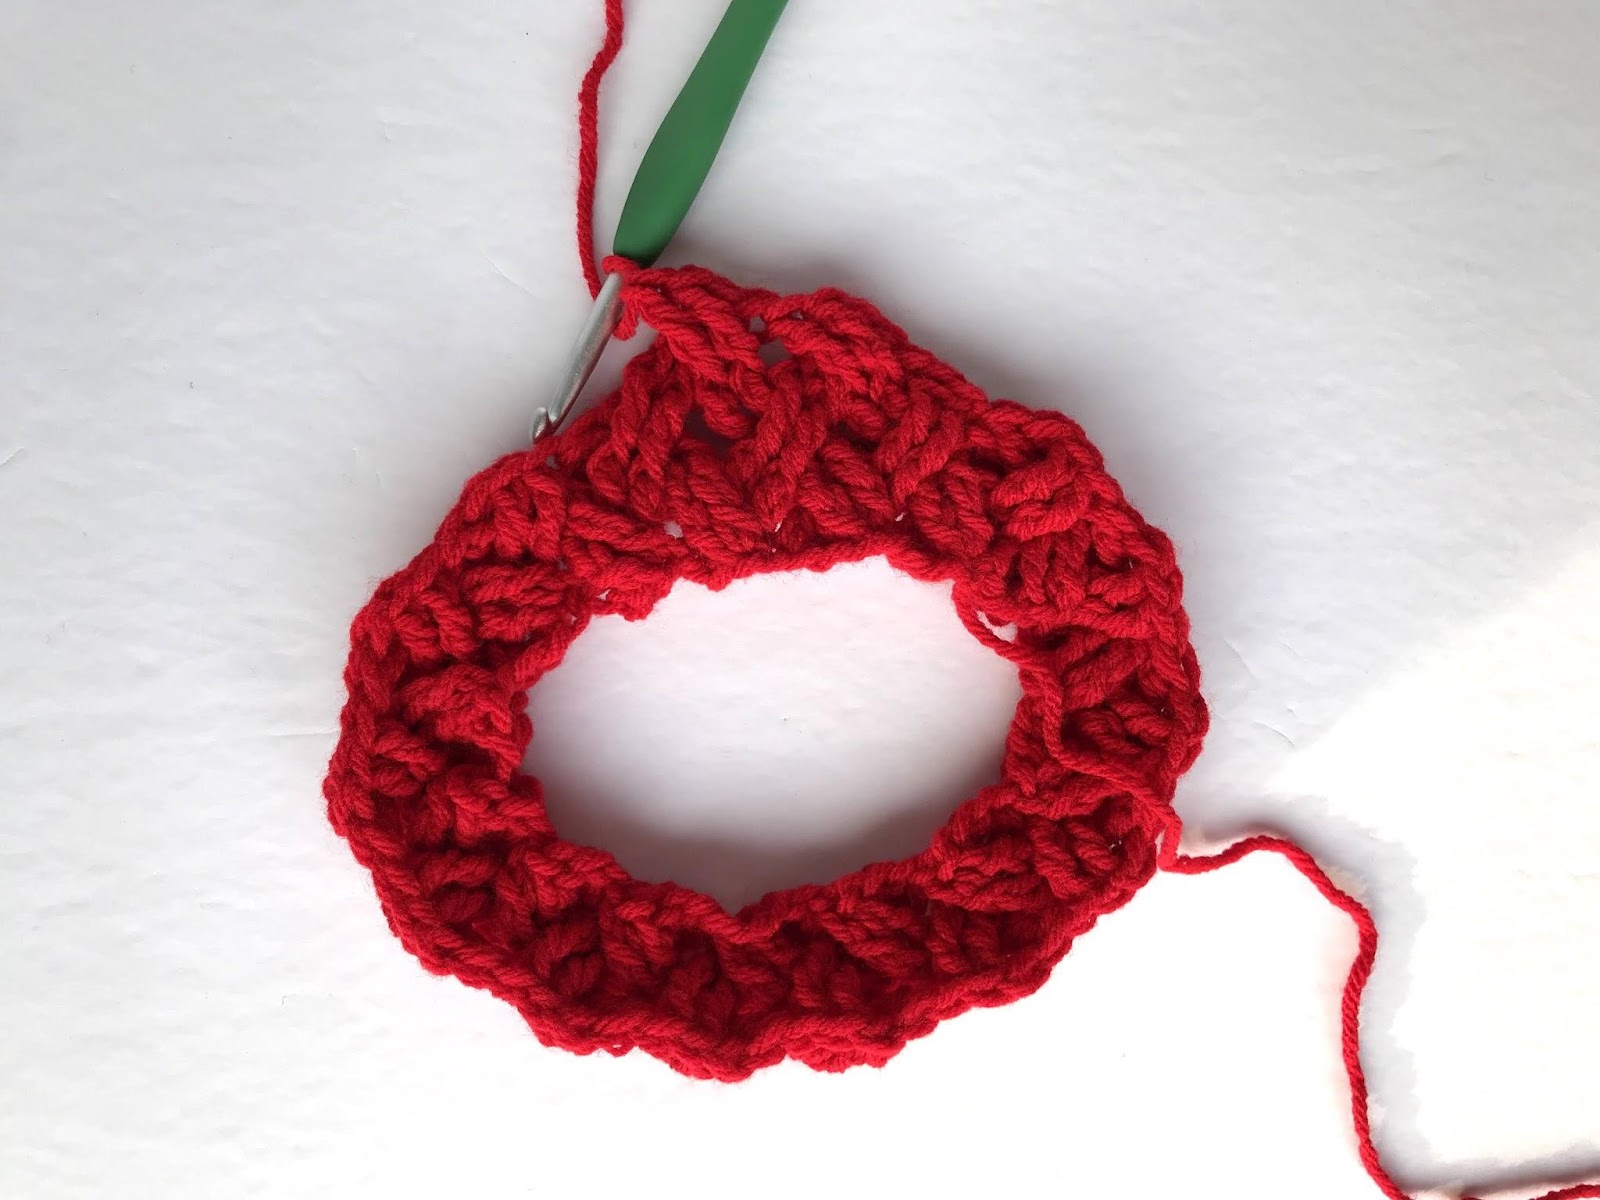
Photo 16: Repeat around until 2 sts remaining.
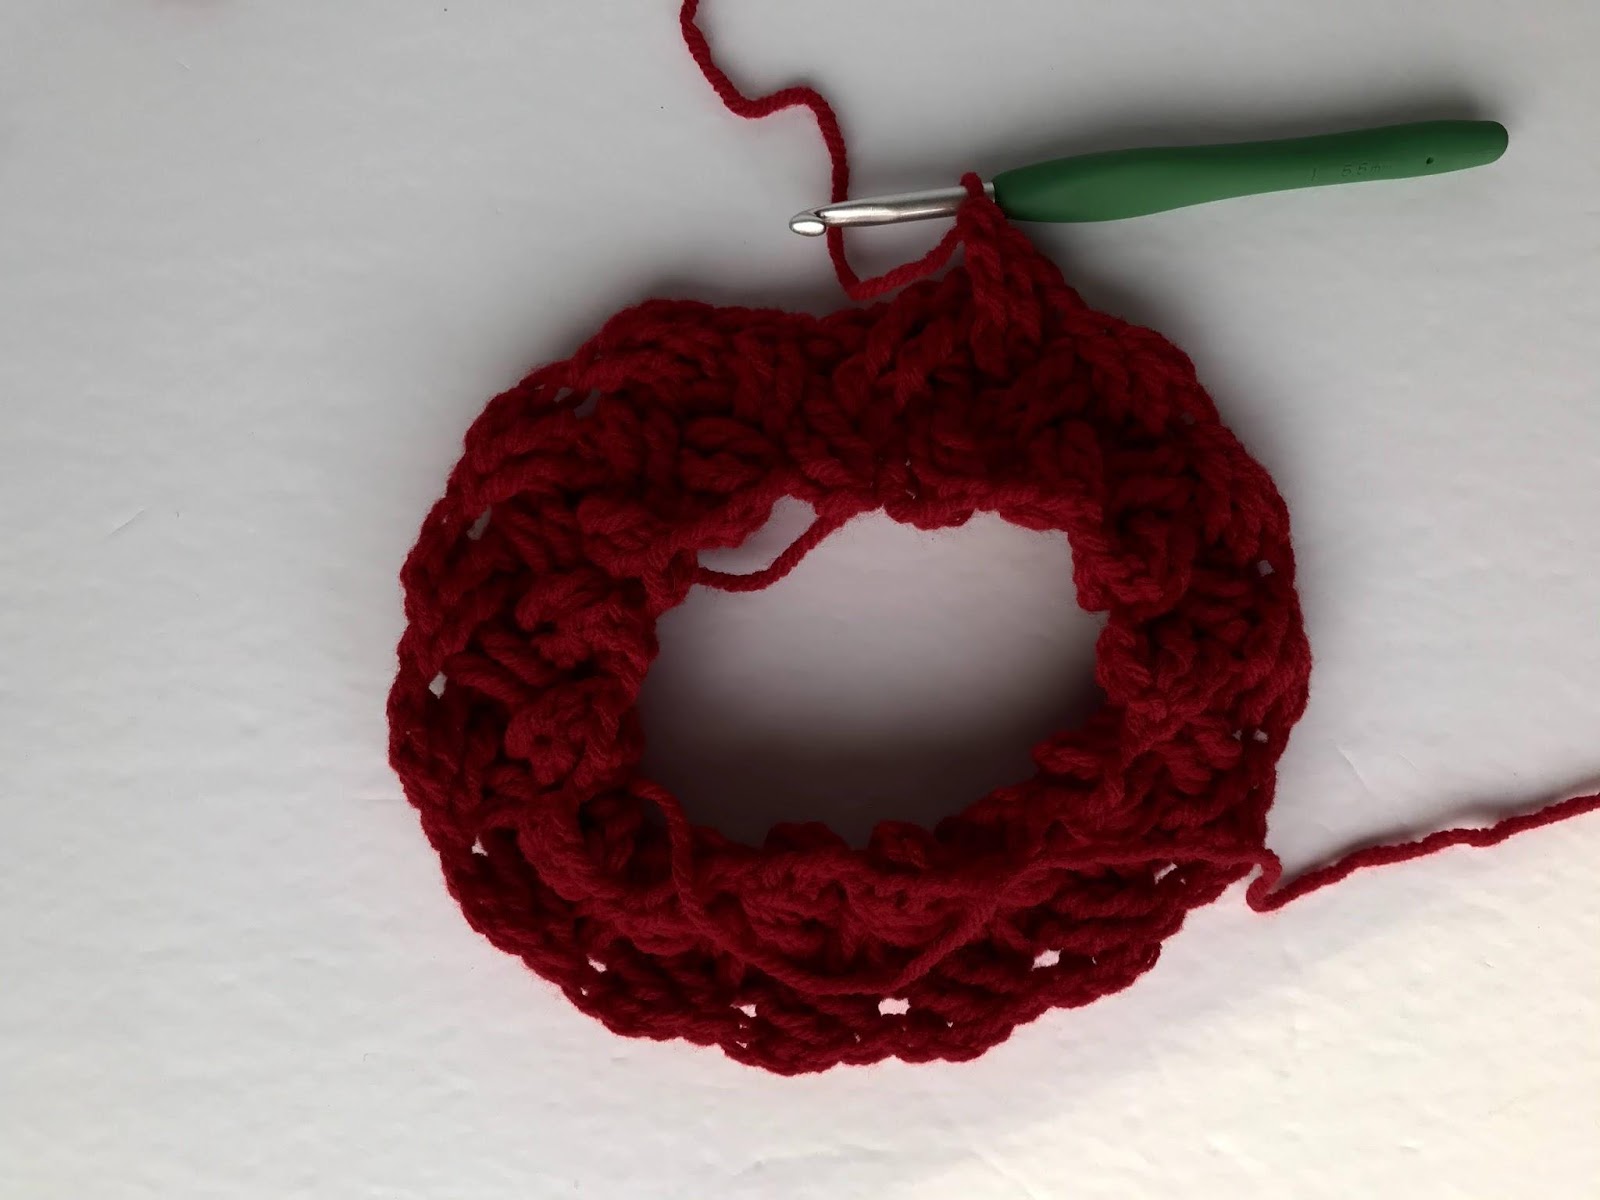
Photo 17: FPTR in first 2 skipped sts from beginning of round.
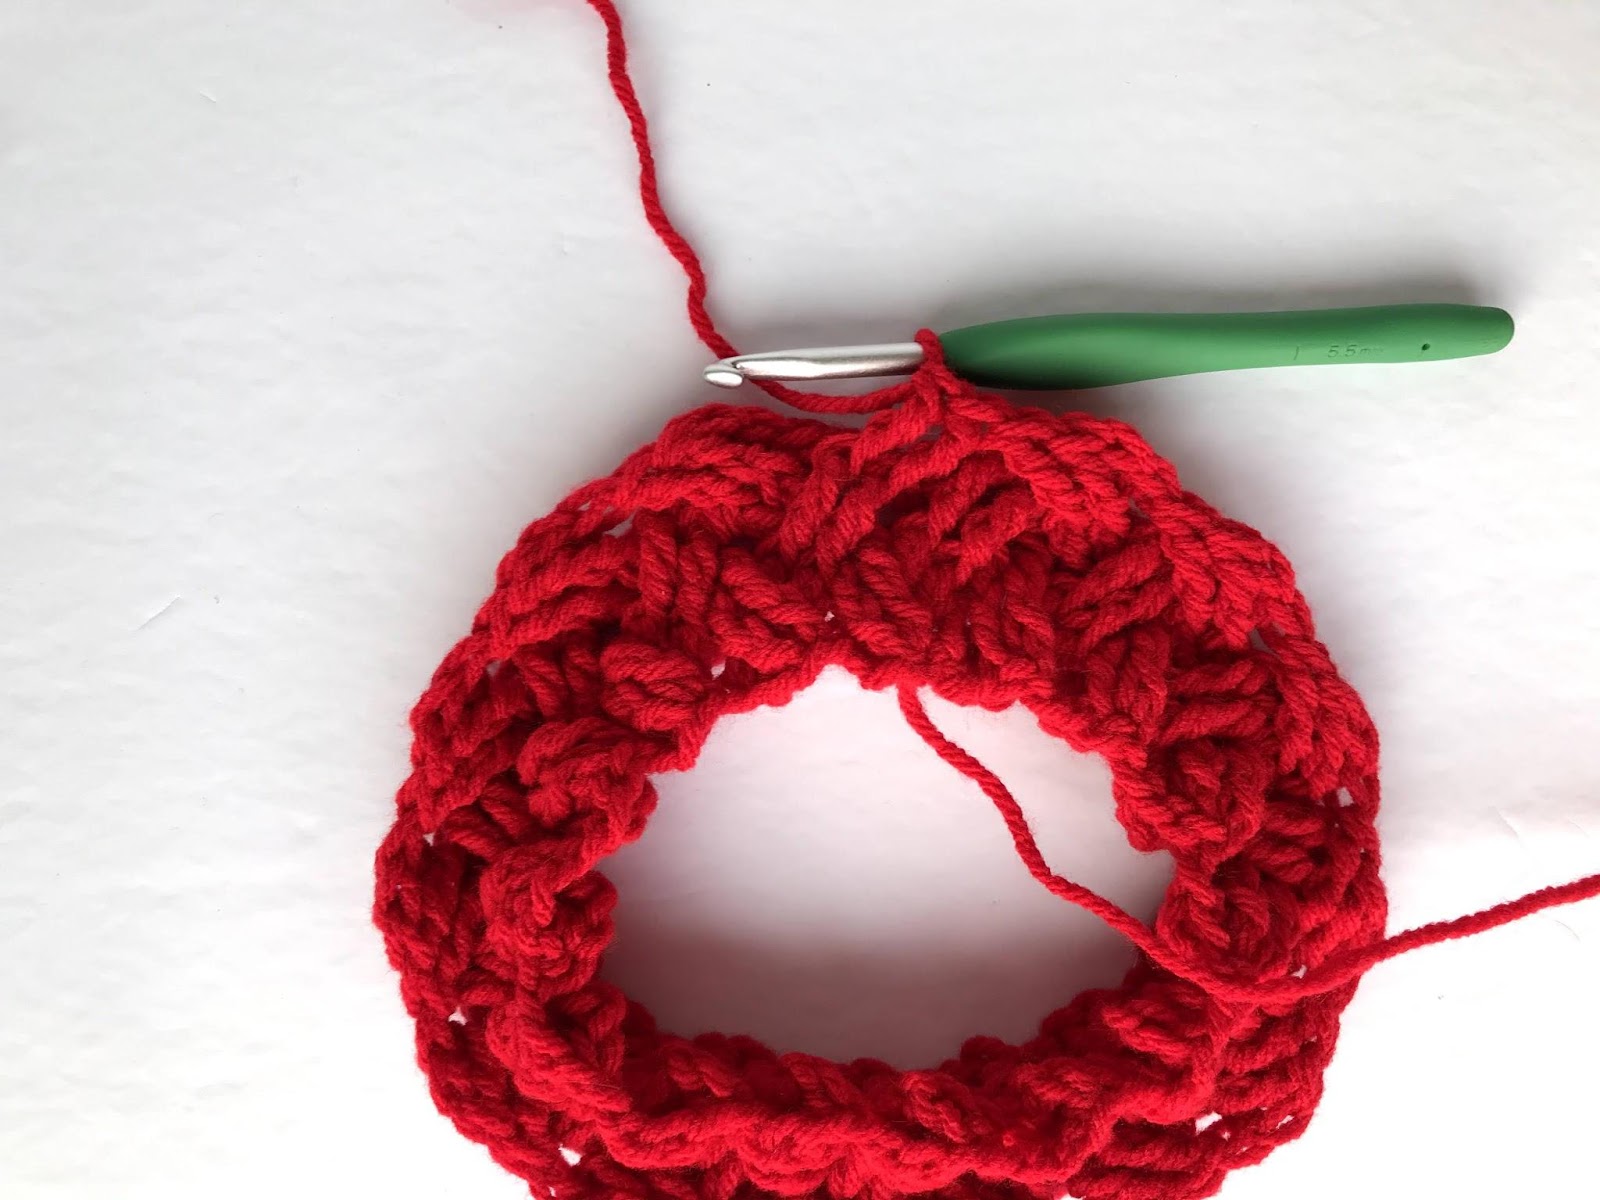
Photo 18: Cross in FRONT to work last 2 FPTR, join to top of the first stitch, skipping over the chain 3.

Patterns using the Celtic Weave Stitch:
- Celtic Weave Christmas Stocking (worked in the round)
- Celtic Stitch Square (worked flat)
- How to Crochet the Celtic Stitch (worked flat)
Celtic Weave Christmas Stocking

Save for later or share with others using the share buttons at the top and bottom of post. If you have any questions please comment below or you can email me at jessica@crochetitcreations.com.
I love to see photos of your work and read your comments. Follow Crochet It Creations on all of your favorite social media sites! Join my Crochet It Creations Crochet Friends Facebook group to further connect!
You may sell your items made from my patterns. Please do not use my photos as your own to sell your work. A link back to my site is much appreciated when selling your items from my patterns. I hope you enjoy!
This site is supported by advertisers and may contain affiliate links. See copyright & disclosure policy here for more information.


[…] Learn How It’s Made: Celtic Weave Stitch in the Round […]