Let me start by saying, I am a crocheter. That is my craft. I have tried to knit and gave up on it. I cannot run my Singer Sewing machine for the life of me. Buuut I can crochet for dayzzz! So, this Cinch Sack Crochet Pattern really challenged me. There was a lot of different crafts included besides crocheting. However, I must say, it was totally worth it!
Also, I decided I wanted to make a cinch sack crochet pattern because I have 3 kids! And let me tell you, those 3 kids always have stuff to pack around. We got sports equipment, books, toys, clothes, you name it and they will bring it. Sooo, a cinch sack crochet pattern is perfect! This way they can pack around their stuff in style!
Now back to my only fiber art talent…crocheting. This Cinch Sack Crochet Pattern only used crocheting on the outer bag. I had to construct and sew an inner liner, pocket, and attach a zipper…..yikes! That’s a lot for someone who cannot work a sewing machine. But I sure can hand sew….I mean I hand sew all the time in crocheting. So, yes I hand sewed the liner, pocket, and zipper. It’s not ideal but I have not taken time out of my crazy life to focus on learning sewing machine basics, which I do plan on doing at some point. If you have any pointers, please let me know!
Let’s talk about materials. I chose Caron Cotton Cakes for this pattern. 1. Because I LOVE Caron Cotton Cakes. 2. Because I bought a TON of it at the beginning of summer. 3. Because I liked the color of the Boho Floral. 4. Because this yarn feels great to work with! But you can really use any Medium #4 weight yarn you choose. I recommend cotton because you will probably need to wash it at some point and you don’t want it to pill.
Next, you will need some fabric. I chose to purchase Fat Quarters. If you don’t know what fat quarters are, they are 1/4 yard of fabric that is cut so it’s a fat square instead of a long strip. They are PERFECT! So many color choices and they are cheap. I purchased mine from my local Walmart. Look at all those pretty choices below…

One suggestion….really check the gauge and measurements of the Cinch Sack. If yours turns out larger, the fat quarter will not be enough fabric! The finished Cinch Sack measures approximately 13″Wx14″H. You will need about an extra inch for width and height. So, if your Cinch Sack measurements match up, 1 fat quarter will be enough fabric.
You can also purchase any fabric of your liking. Remnants may also work well and could buy for cheap.
You will also need a 7″ zipper, which I also purchased at Walmart. Then you will need a package of Extra Large Eyelets or Grommets. Don’t forget to also purchase the Eyelet Kit, which is a tool that allows you to add the Eyelet to your Cinch Sack. I also found this at my local Walmart….score! You will need 2 Eyelets total. 2 front pieces and 2 back pieces, but they come in a package like the ones below.
Some Eyelets come included with the tool. But Walmart sells them separately.


I originally planned on crocheting an I-Cord to use as the straps, like I did in my Carry All Drawstring Tote Crochet Pattern found HERE. But, I was worried that it would have too much stretch to it. So, I decided to purchase some rope. Since I did not look for it at Walmart, I ended up purchasing this at Hobby Lobby. I found this polyester 1/4″ white rope in the fabric/sewing section. It comes in 5 yards, which was plenty! I used 6′ (72″) on each side, which is folded in half to get the drawstring cinch at the top. I’m sure you could find some rope to use at other locations, or make your own I-Cord.

You will also need a few other materials besides those we discussed so far. Which includes sewing needle, thread (I prefer the sturdier thread like embroidery or upholstery), scissors, hammer (for the eyelets), and H 5.0mm crochet hook. Now, this may seem like a lot, but I promise this project was not hard at all. It was actually fun to put it all together. I challenge you to try it! Then tag me on social media so I can see.
Now that you have the materials down, let’s talk construction. You will need to start with crocheting the bag…. Follow the pattern below.

Materials Needed
- H 5.0 crochet hook, or size needed to obtain gauge
- Less than 2 skeins of Caron cotton cakes or any Medium Weight #4 yarn. I HIGHLY recommend cotton for durability.
- 1 Fat Quarters fabric, or any fabric of choice
- 1 7” zipper
- 2 Eyelets & Eyelet Kit
- Rope, at least 12 feet (4 yards)
- Thread
- Needle
- Scissors
- Hammer
Gauge
- 4” square – 10.5 rows x 15 stitches
Stitches Used/Notes
- Written in U.S. Crochet Terms
- HDC – Half Double Crochet
- Join – Slip Stitch to First Stitch
- Be sure to make a gauge swatch before starting and adjust crochet hook to obtain gauge.
- If your Cinch Sack turns out larger than measurements, the Fat Quarter Fabric may not be enough material.
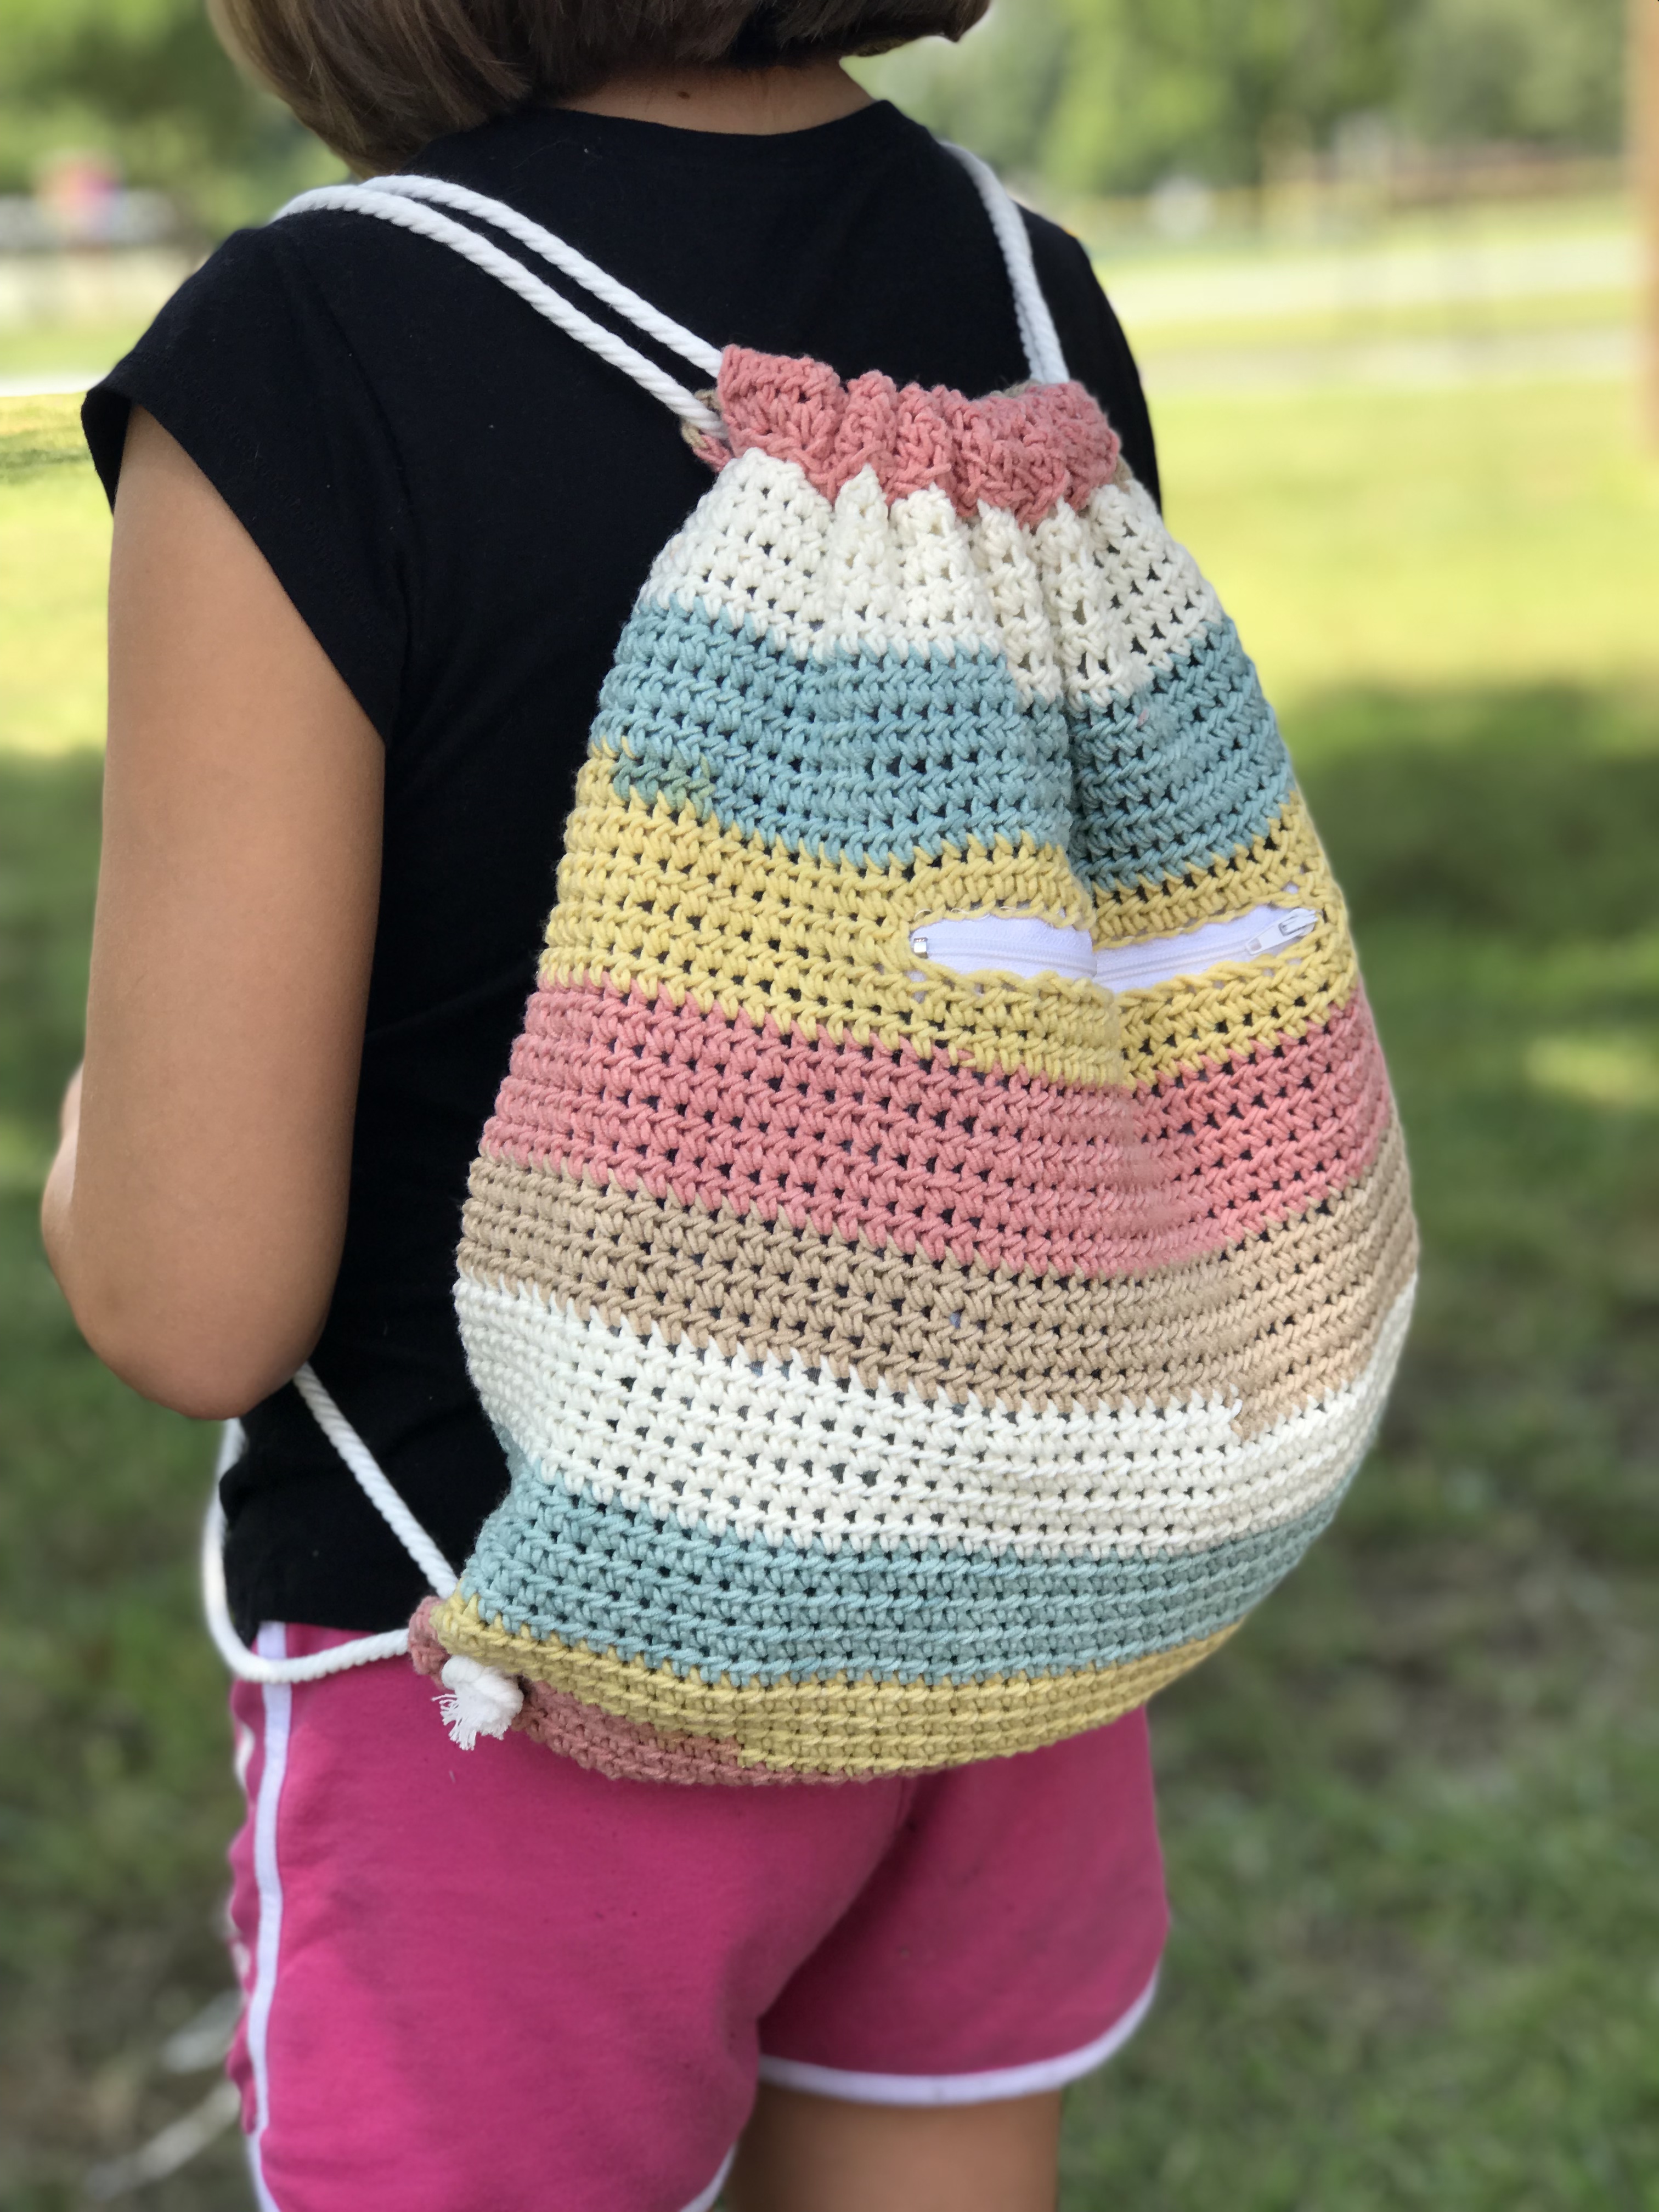
- Finished Cinch Sack measures approximately 13″Wx14″H not including the top flaps that fold over and hold the drawstrings.
Chain 51
Rnd 1: hdc in 2nd ch from hook and each ch across, turn and hdc in each chain on other side. Do not join (100) place stitch marker
Rnd 2: hdc around (100) move stitch marker at each round
Rnd 3: hdc in 3 st, ch 1 and skip 1 st, hdc in 44 st, ch 1 and skip 1 st, hdc in 4 st, ch 1 and skip 1 st, hdc in 44 st, ch 1 and skip 1 st, hdc in last st. (100)
Rnd 4: hdc in each st around including in ch-1 space (100)
Rnd 5-24: hdc around (100)
Zipper row – since working with hdc the seam angles to the right. We will need to get the zipper to the front center. If using a 7” zipper, I suggest to use stitch markers to mark 26 stitches in the center of the front of the bag.

Rnd 25: hdc in 29 st, ch 26, skip 26 st, hdc in remaining 45 st (100)
Rnd 26: hdc in each st around including each chain (100)
Rnd 25-35: hdc around (100) join after last round. finish off
Lay Cinch Sac flat. Join to the top right corner. ch 1
Row 36: hdc in 50 st. (50) ch 1 and turn
Row 37: hdc across (50) ch 1 and turn
Row 38: hdc across (50) finish off leaving long tail for sewing the top flaps.
Join to other side of cinch sack’s corner. Repeat rows 36-38.

Take the fat quarter, which comes in 2 pieces. Sew it as wide and tall as the cinch sack with the right sides facing together. Approximately 14” wide x 15” tall (not including the flap that folds over). You want an extra inch on each side for give.
See my hand sewing photo below. Or use a sewing machine.

Take the left over from the fat quarter and sew together a pocket that is 7.5” wide. Make sure to sew right sides facing each other. Sew together the pocket and zipper to the hole in the side of the cinch sac.
I am no expert on sewing. I sewed my pocket together first. Then sewed the zipper on to the Cinch Sack. Next I sewed the pocket to the inside of the zipper.
I do recommend to place the pocket like this. Open the zipper, insert the pocket in with the right side facing out. Sew the pocket from the inside going over the zipper and edge of crochet. That way when you push the pocket back in you will be able to see the right side of the fabric and the edging of the fabric will be folded in. If you need extra help with this, there are many videos on YouTube.

Sew the liner around the top parameter of the Cinch Sack, below the flaps that fold over. Making sure the right side of the fabric will be showing. I followed the same technique as the pocket, where the liner is outside the Cinch Sack like the photo above.
Sew the parameter around the bag then push it inside when finished. This will fold the top edge in and not fray. No need to sew anywhere else, the bottom will be secured when adding the eyelets.

Now that you have the zipper, pocket, and liner completed, you are ready to add the eyelets to the bottom. The eyelets purpose is to hold the straps. The eyelet helps keep it sturdy for the knots and holds the inside liner in place.

Start by smoothing out the inside of the liner. You want it to reach the bottom and both corners. It may be best to pin the corners of the Cinch Sack and liner together. This will keep the liner in place. Cut an X in the liner on both sides of the holes at the bottom corners. The XL eyelets are fairly large, so you will need to cut a somewhat large X to get it to insert. Use your eyelet to compare or insert through the backside to determine where/how to cut. 
Follow directions on the Eyelet kit for how to insert. It will let you know which one is for the front and which is for the back.

Use the Kit and Hammer the Eyelet together. This needs to be done on a hard surface, like concrete.

Below is how the eyelet looks once finished.

Cut the 2 pieces of the rope 6′ long (72″). Double over and feed through the Eyelet. Tie a knot. You will want the knot in the front of the Cinch Sack.


Take the rope ends and lay around the top. You will notice that it is overlapped around each side. So, when you pull each side of the rope, the center will cinch together. You will want to pin the ropes in place while you sew the top flaps over.

Fold the first flap down and sew across. Make sure to not sew through the rope. The rope needs to be able to move through the hole you are creating.


Annnnd there you have it! Give yourself a pat on the back for accomplishing this. And then share a photo with me on social media.

Save for later or share with others using the share buttons at the top and bottom of post. If you have any questions please comment below or you can email me at jessica@crochetitcreations.com.
I love to see photos of your work and read your comments. Follow Crochet It Creations on all of your favorite social media sites! Join my Crochet It Creations Crochet Friends Facebook group to further connect!
You may sell your items made from my patterns. Please do not use my photos as your own to sell your work. A link back to my site is much appreciated when selling your items from my patterns. I hope you enjoy!
This site is supported by advertisers and may contain affiliate links. See copyright & disclosure policy here for more information.


Thanks so much for taking the time to provide not only the free pattern but also all the extra details for the type of yarn, eyelets, etc. I’m looking forward to trying this out! 🙂
[…] full article about the free pattern and the photos is here. More info on raverly can be […]
Loved this pattern!!! Turned out so cute!!! Would love to add photos if possible! Very proud of how easy this was to follow!!
[…] Cinch Sack Bag […]